December 25, 2023
Product Updates & News
Enable HTTPS for On-premises PACS
HTTPS communication can be enabled for on-premises PACS.
Communication will be encrypted and it allows you to operate on-premises PACS for more secure.
📑Download this article in PDF
1. Create a server certificate
Create a self-signed certificate using Powershell.
- Start PowerShell as administrator
- Execute the following command. In "DESKTOP-XXX", enter the computer name.
>New-SelfSignedCertificate -DnsName DESKTOP-XXX -CertStoreLocation "cert:\LocalMachine\My" -NotAfter (Get-Date).AddYears(50)
2. Export the certificate
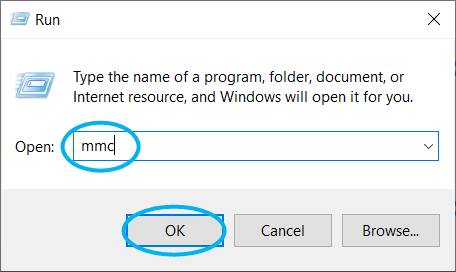
- In Run command window, enter "mmc" and click OK.

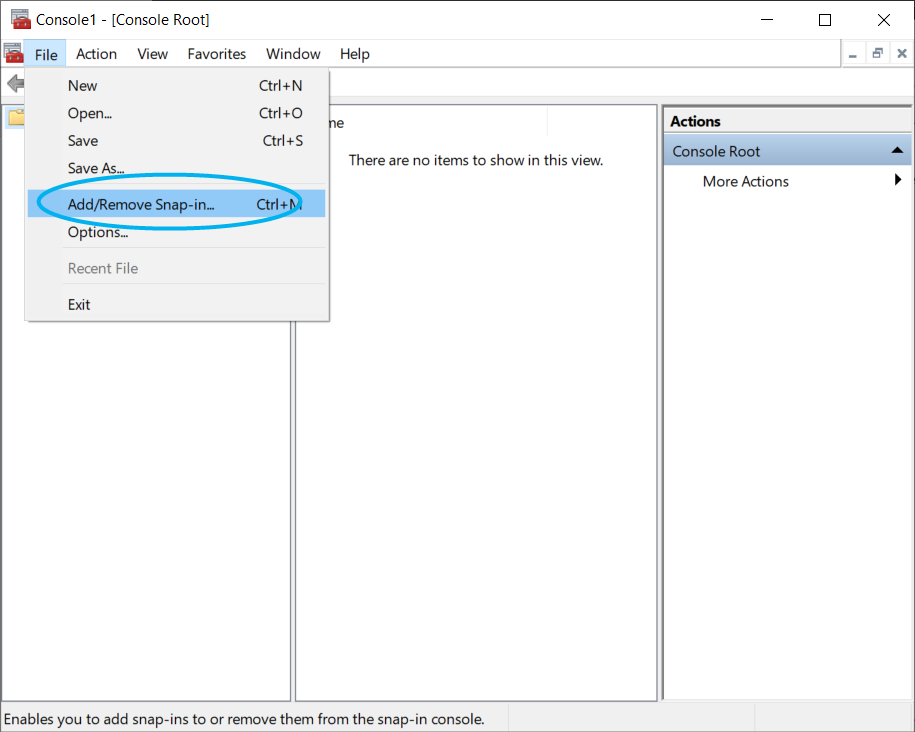
- Open "Add/Remove Snap-ins" from "File" tab.

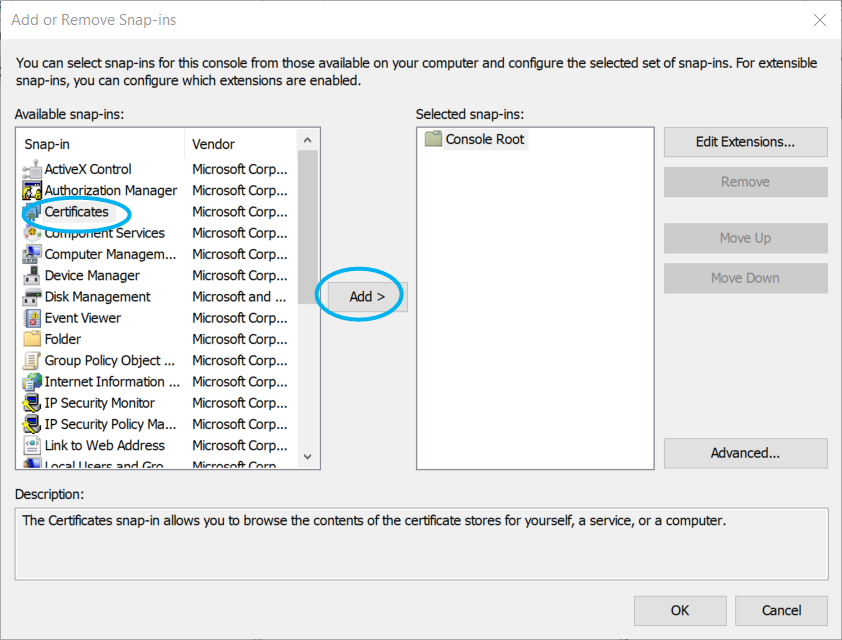
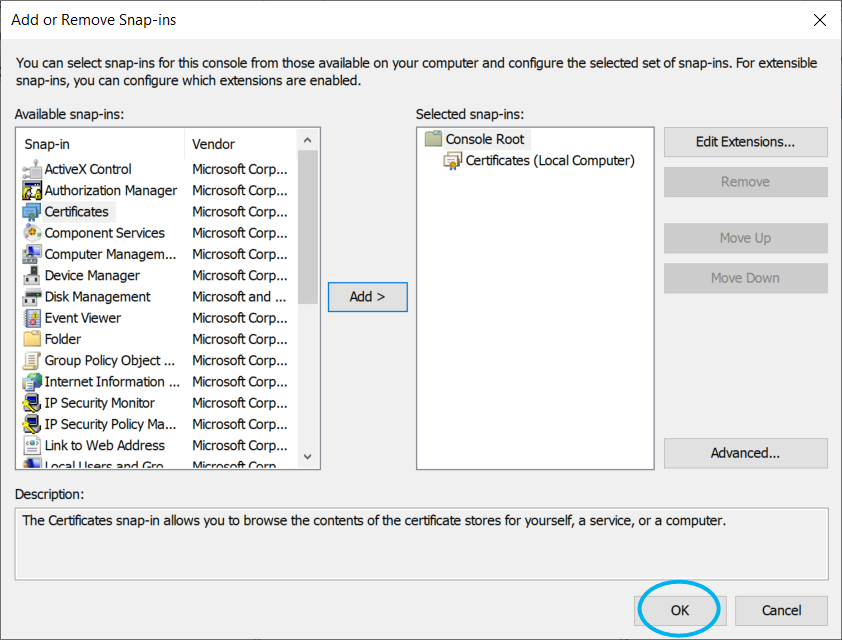
- Select "Certificates" from "Available snap-ins" and click "Add" button.

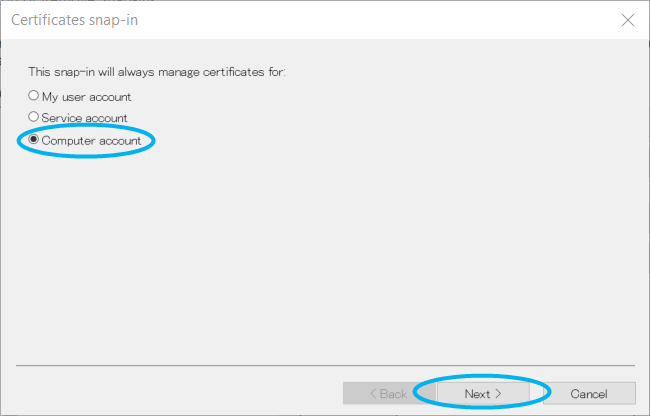
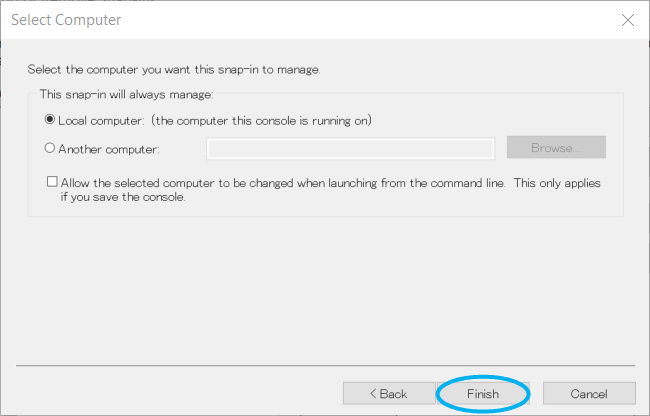
- Select "Computer account" and click "Next".

- Click "Finish".
- Click "OK".
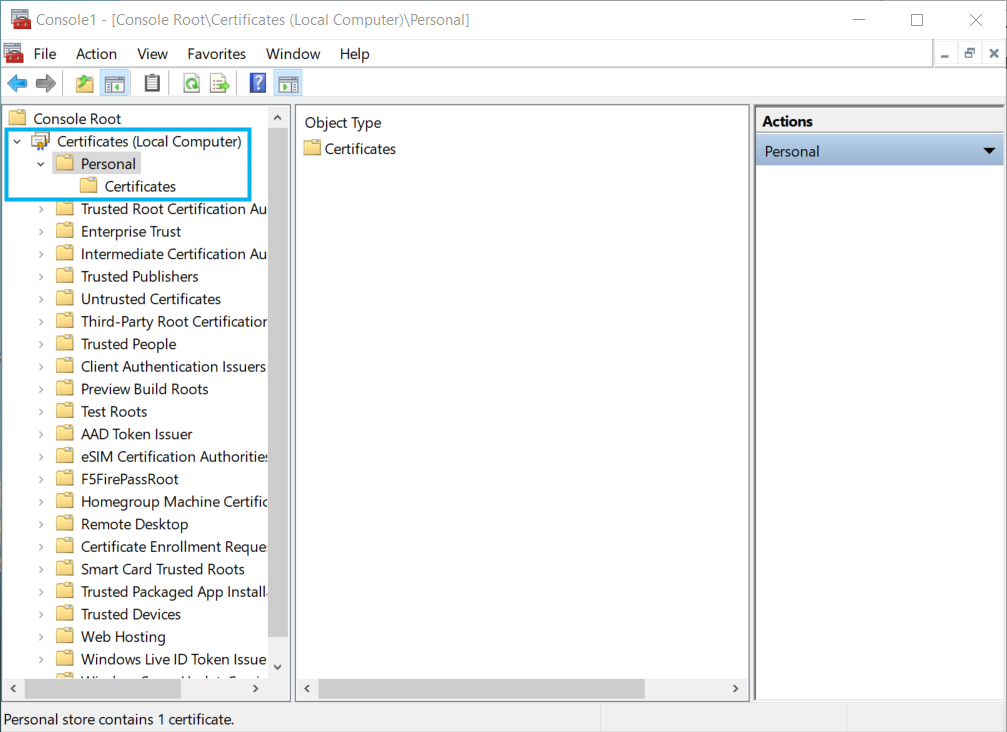
- In "Console Root", open Certificates > Personal > Certificates.

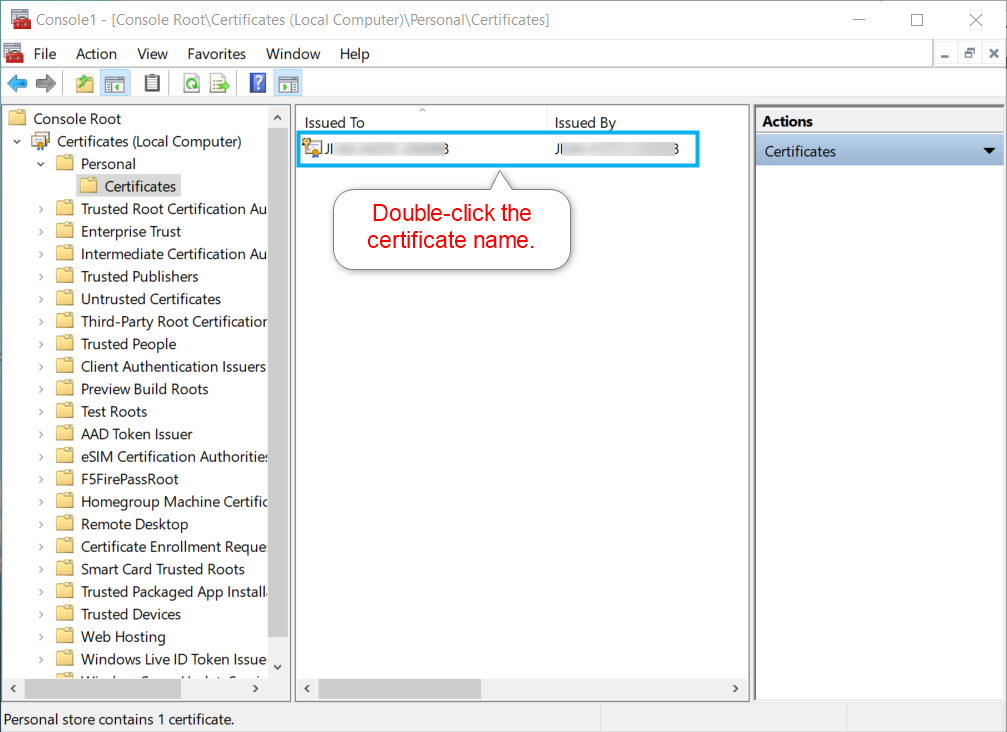
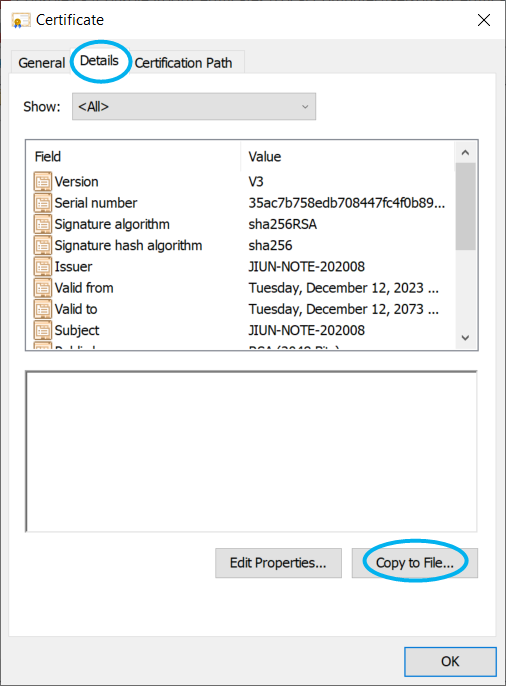
- You will see the certificate with the computer name. Double-click on it.
- In "Details" tab, click "Copy to File".

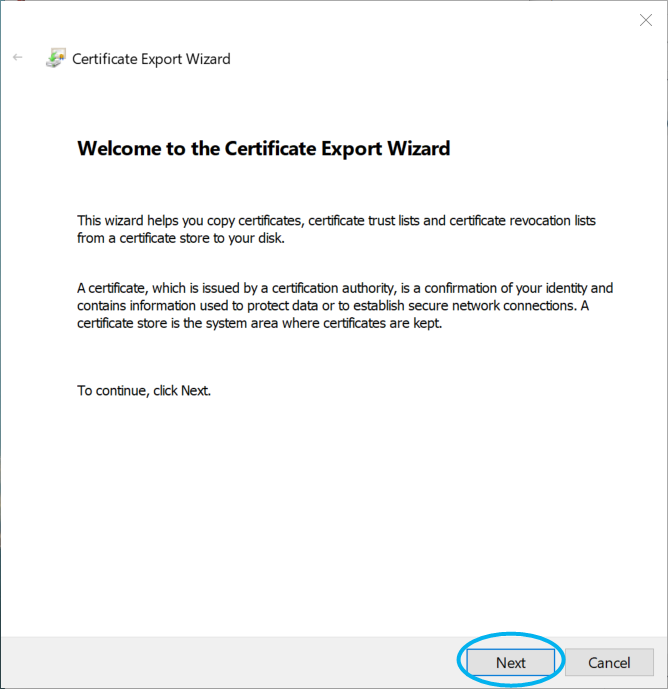
- The Certificate Export Wizard will appear. Click "Next".

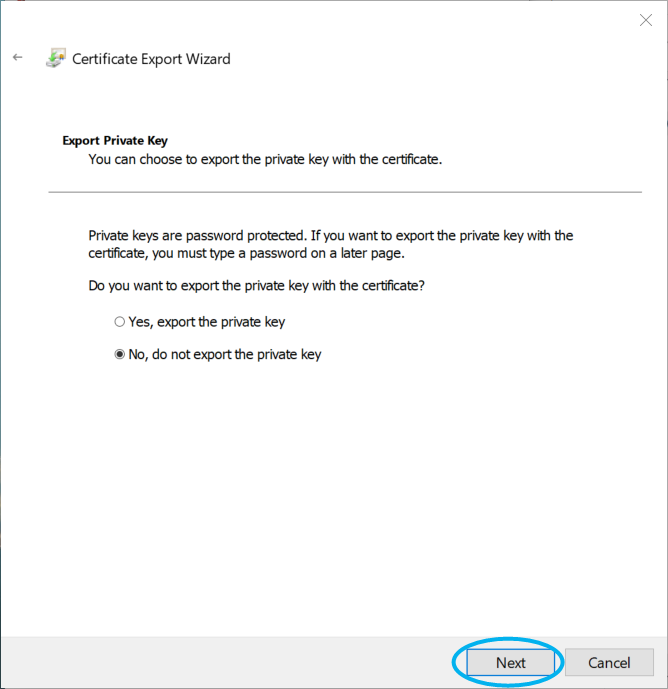
- Click "Next".
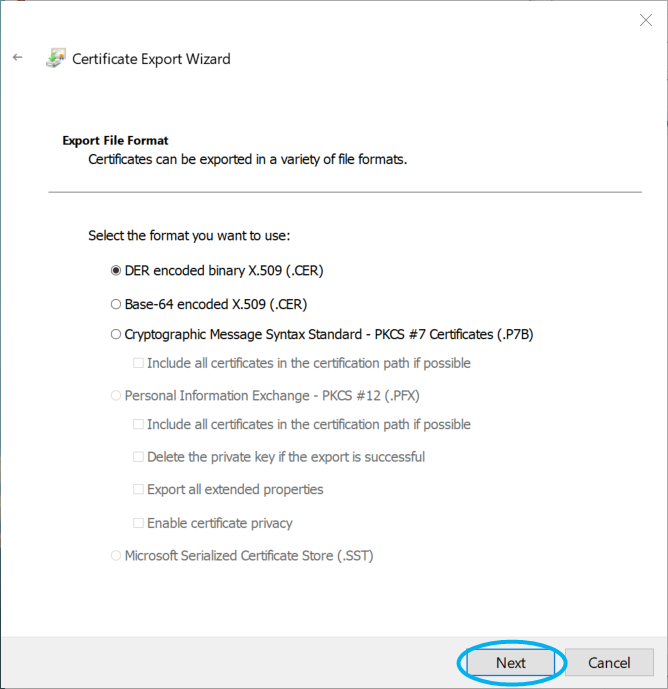
- Click "Next".
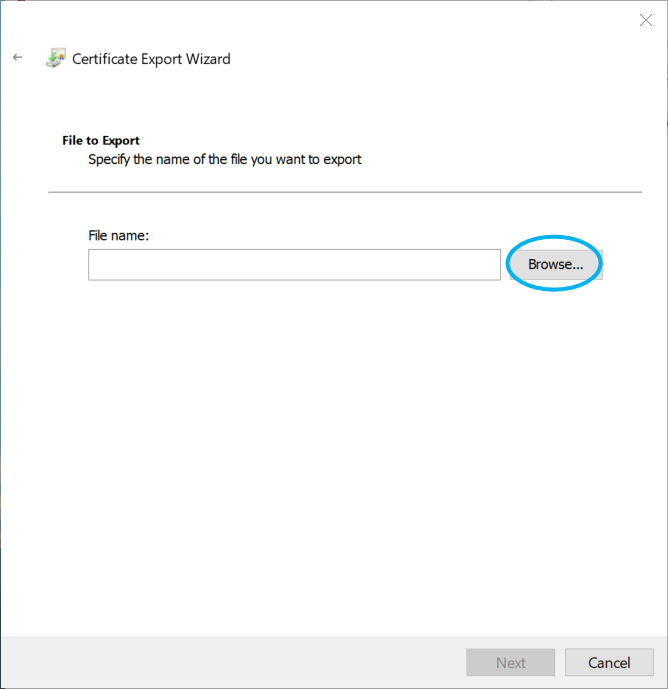
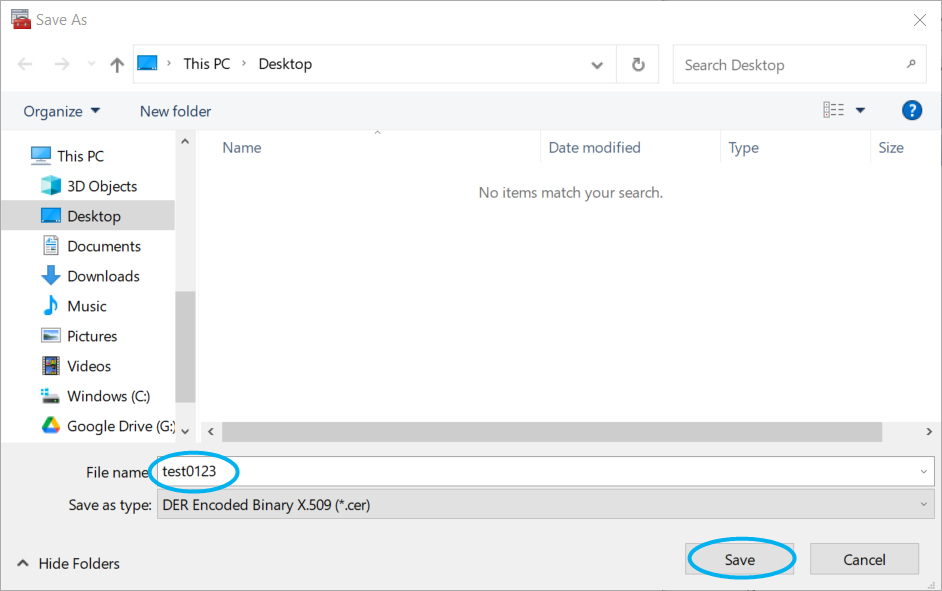
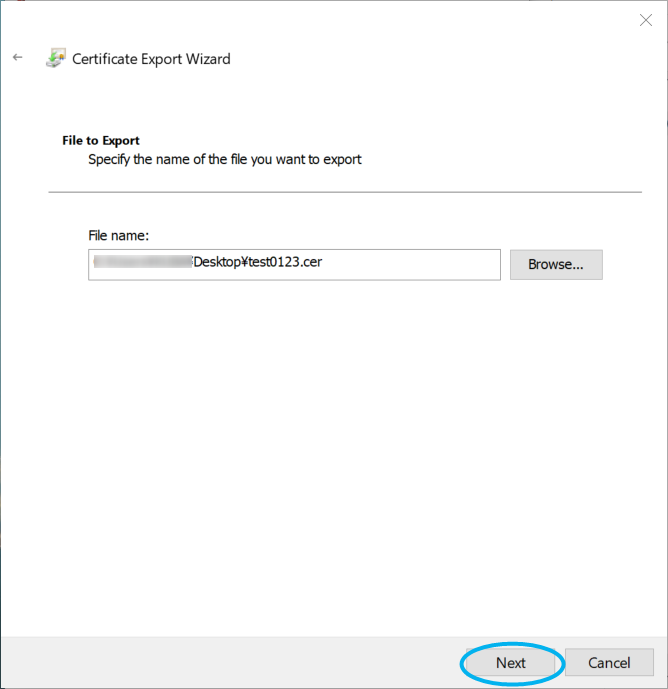
- Click "Browse", name the file to be exported, specify any location such as the desktop, and click "Save".

- Click "Next".
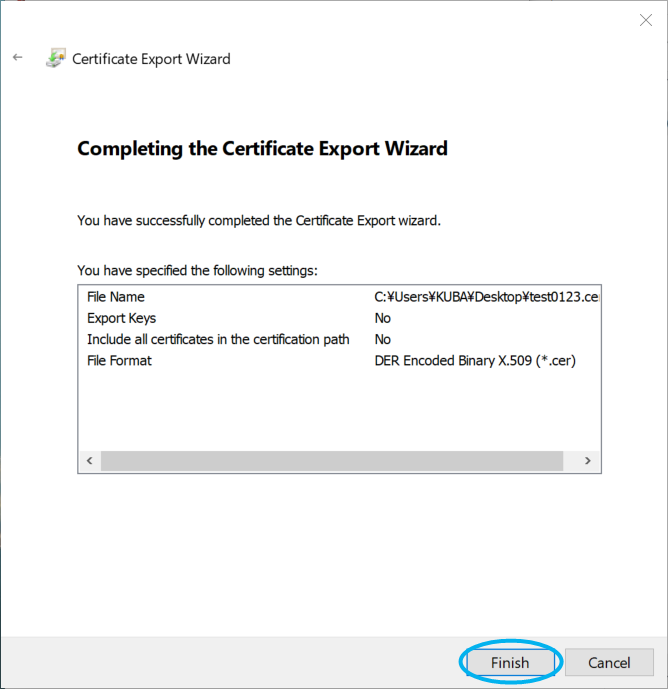
- Click "Finish" to complete the Certificate Export Wizard.
3. Import the certificate into Trusted Root Certificate Authorities
- Open the .cer file you saved.
- Click "Install Certificate".

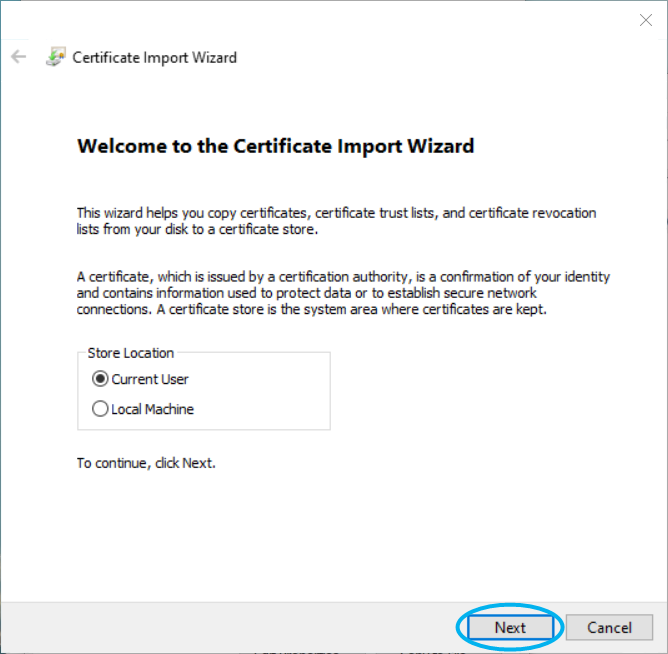
- The Certificate Import Wizard will appear. Click "Next".

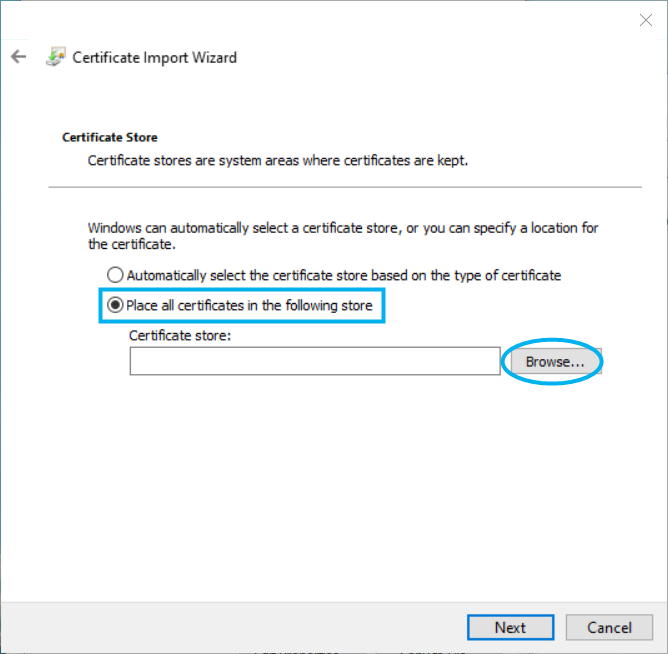
- Select "Place all certificates in the following store" and click "Browse".
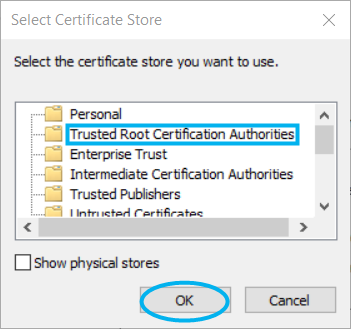
- Select "Trusted Root Certificate Authorities" and click "OK".

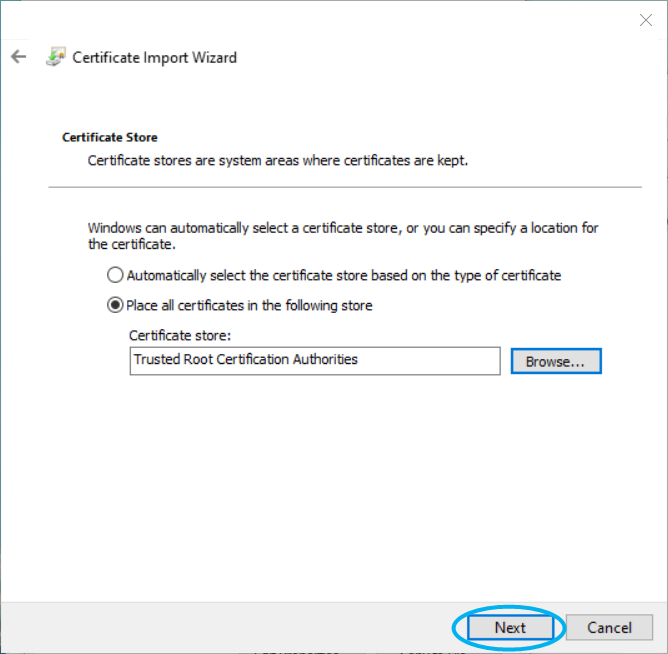
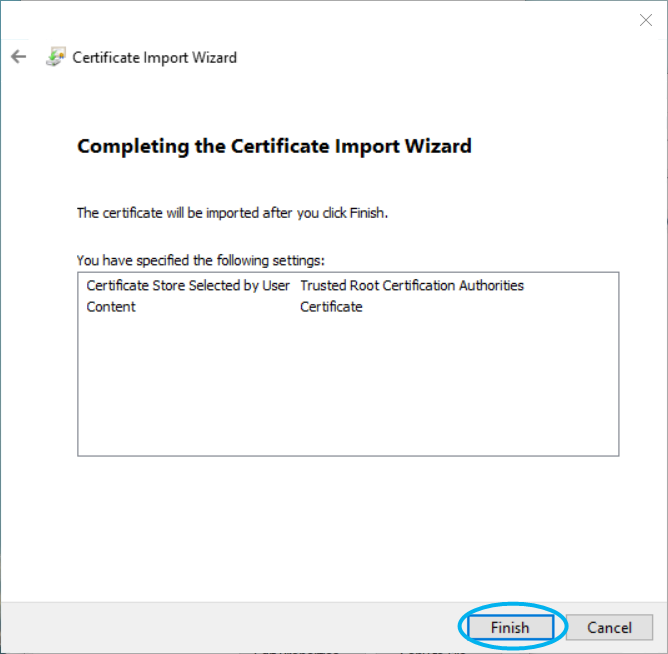
- Click "Next".
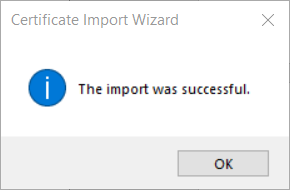
- Click "Finish" to complete the Certificate Import Wizard.


4. Enable HTTPS communication
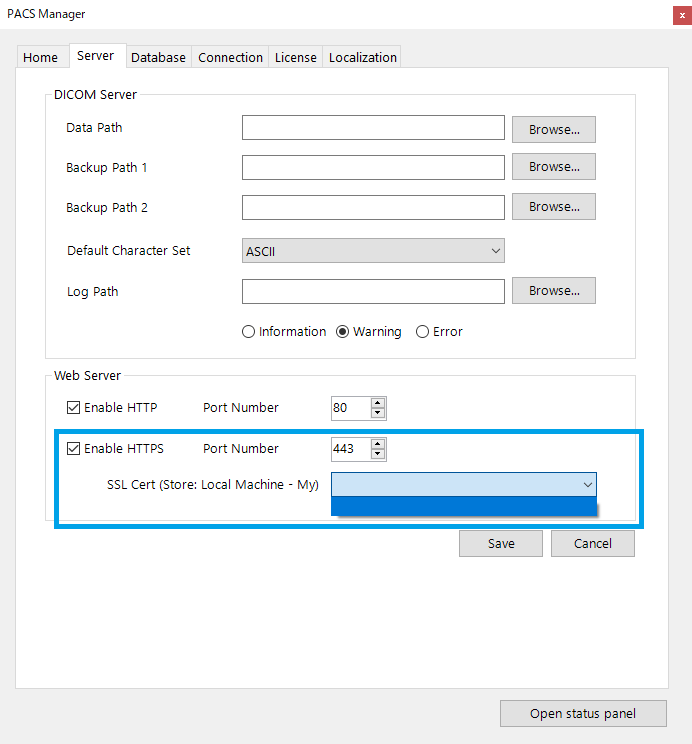
- In PACS Manager, make sure that the status of DICOMApp is "Stopped".
If the status of DICOMApp is "Running", click "Stop" to stop SonicDICOM PACS.
- In "Server" tab, check "Enable HTTPS". In "SSL Cert", select the Server Certificate that has been issued.

- Click "Save" and start DICOMApp.
- Access https://DESKTOP-XXX/viewer/

*Note: In "DESKTOP-XXX" above, be sure to enter the computer name you specified. Do not enter the IP address here.
We recommend that you bookmark this URL for easy access.
When accessing from another PC, follow 3. Import the certificate into Trusted Root Certificate Authorities on that PC.